
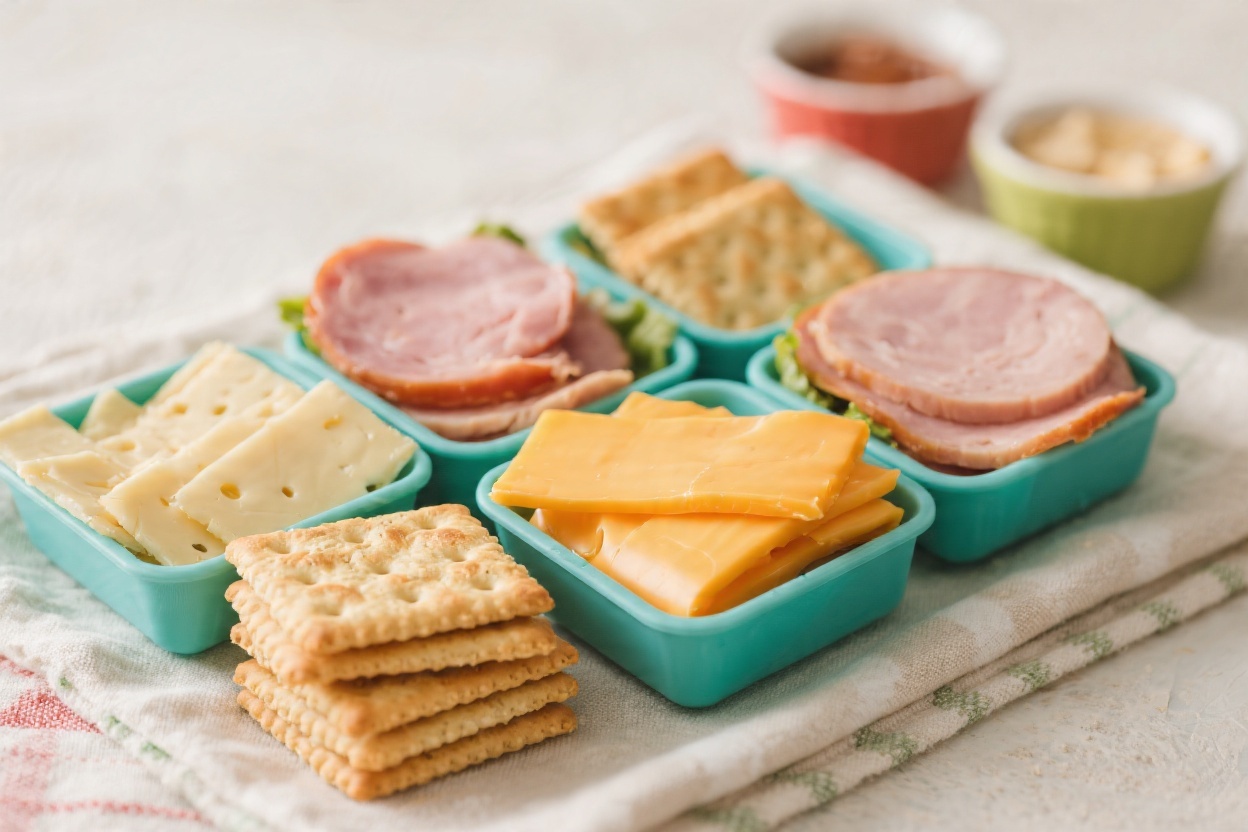
Skip the store-bought box and build your own snack kit that actually tastes good. Homemade Lunchables are quick to assemble, budget-friendly, and easy to customize for picky eaters or busy days. You control the ingredients, the portions, and the quality.
This version sticks to the classics—crackers, cheese, and deli meat—while giving you plenty of options to mix things up. Pack a few for school, work, or road trips and you’re set.
Homemade Lunchables (Crackers, Cheese, Deli Meat) - A Simple, Packable Snack
Ingredients
- Crackers: Buttery, multigrain, or whole wheat rounds or squares
- Cheese: Cheddar, Colby Jack, Swiss, provolone, or mozzarella (block or pre-sliced)
- Deli meat: Turkey, ham, chicken, or salami (sliced)
- Optional add-ins: Baby carrots, cucumber slices, cherry tomatoes, apple slices, grapes
- Extras for flavor: Mustard, hummus, ranch, or a small honey mustard cup
- Sweet bite (optional): A few dark chocolate squares or dried fruit
- Containers: Divided lunch box or small lidded containers, plus mini sauce cups
Instructions
- Pick your base cracker. Choose a sturdy cracker that won’t go soggy or crumble easily. Whole grain or seeded crackers add texture and fiber.
- Choose two cheeses. Go for one mild (like mozzarella) and one sharp (like cheddar) for contrast. Slice into cracker-sized squares or use a mini cutter for uniform pieces.
- Layer your deli meats. Turkey and ham are crowd-pleasers. Fold slices into quarters or roll them so they fit neatly in a compartment.
- Add produce for balance. Include crisp veggies or fruit in a separate section. Keep wet items like tomatoes or apple slices away from crackers.
- Pack a dip or spread. A teaspoon of mustard or hummus makes simple stacks feel special. Use a leakproof mini container.
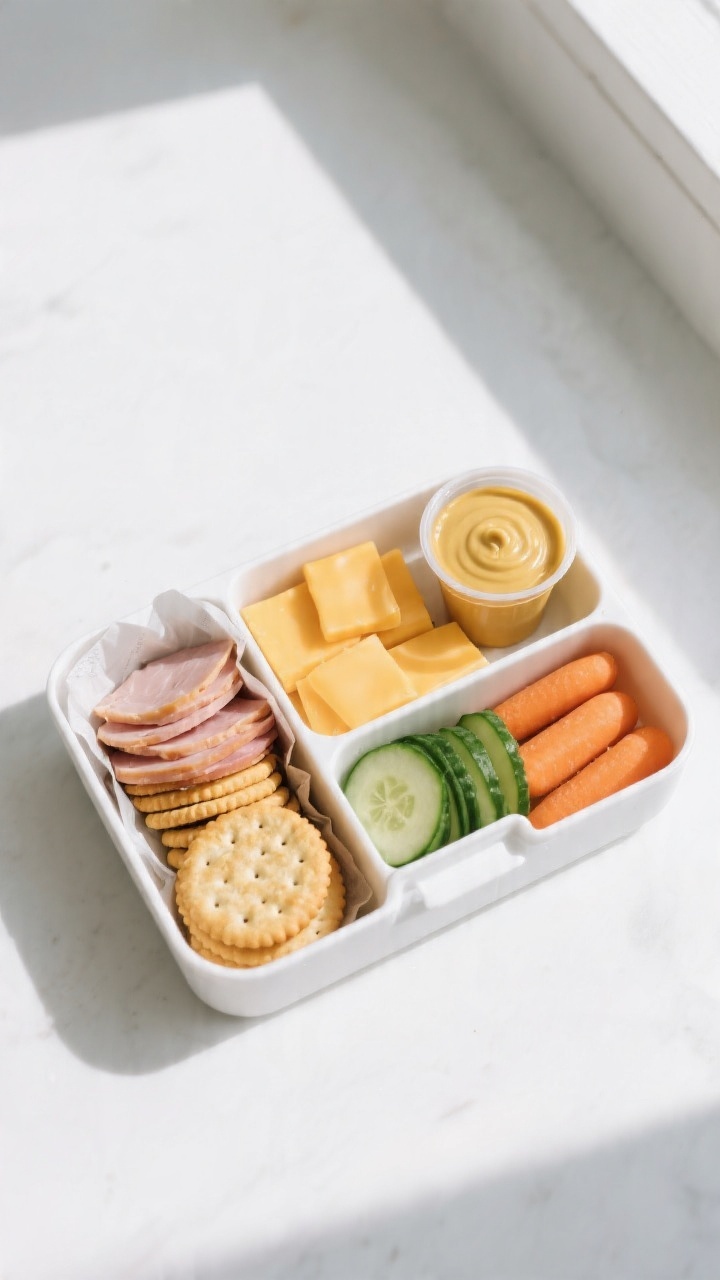
- Assemble smart. Put crackers in their own dry compartment. Meat and cheese can share a section with a small piece of parchment between layers.
- Portion it out. For a light lunch, aim for 12–15 crackers, 3–4 ounces of meat, and 2–3 ounces of cheese. Add produce to fill out the box.
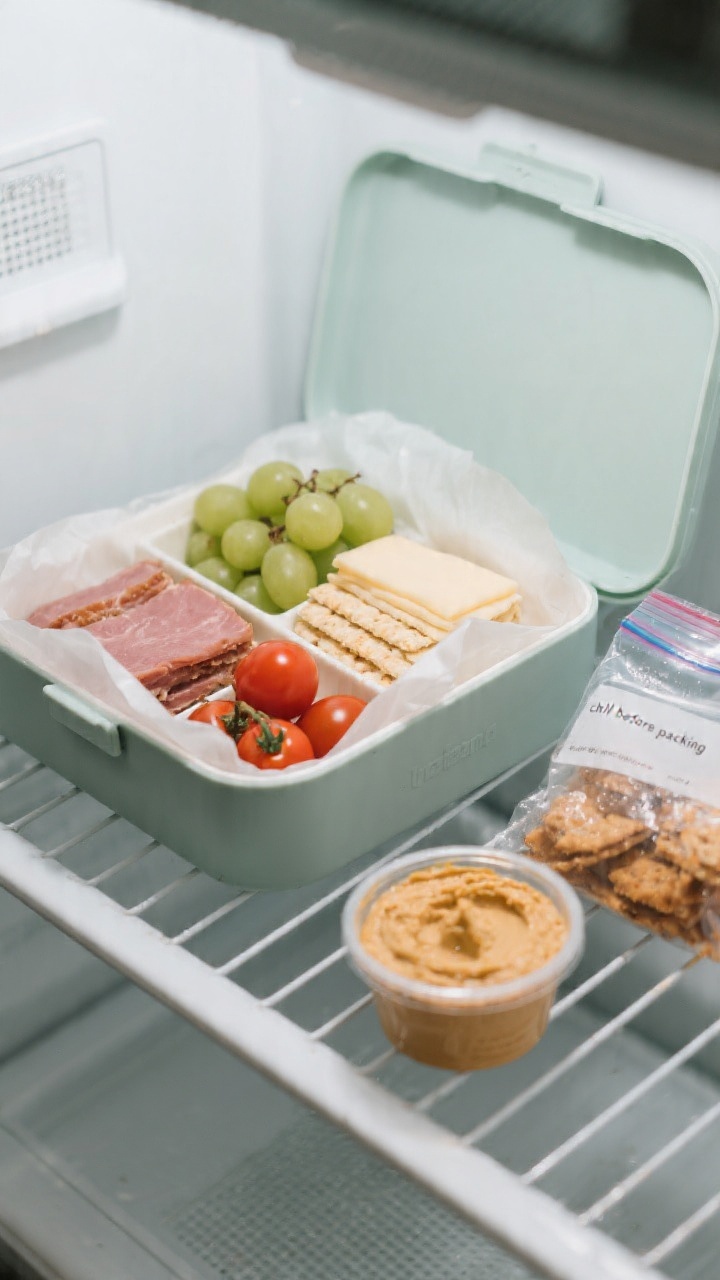
- Chill before packing. Refrigerate the assembled box for 20–30 minutes so everything firms up and stays cool longer on the go.
What Makes This Special
This simple snack box is more than a throwback—it’s smart meal prep. You get fresh ingredients, better textures, and real flavor.
It’s also portable and flexible, so it works for lunches, after-school snacks, or a light dinner. Best of all, it takes minutes to put together and can be scaled up for the week.
What You’ll Need
- Crackers: Buttery, multigrain, or whole wheat rounds or squares
- Cheese: Cheddar, Colby Jack, Swiss, provolone, or mozzarella (block or pre-sliced)
- Deli meat: Turkey, ham, chicken, or salami (sliced)
- Optional add-ins: Baby carrots, cucumber slices, cherry tomatoes, apple slices, grapes
- Extras for flavor: Mustard, hummus, ranch, or a small honey mustard cup
- Sweet bite (optional): A few dark chocolate squares or dried fruit
- Containers: Divided lunch box or small lidded containers, plus mini sauce cups
How to Make It

- Pick your base cracker. Choose a sturdy cracker that won’t go soggy or crumble easily. Whole grain or seeded crackers add texture and fiber.
- Choose two cheeses. Go for one mild (like mozzarella) and one sharp (like cheddar) for contrast.
Slice into cracker-sized squares or use a mini cutter for uniform pieces.
- Layer your deli meats. Turkey and ham are crowd-pleasers. Fold slices into quarters or roll them so they fit neatly in a compartment.
- Add produce for balance. Include crisp veggies or fruit in a separate section. Keep wet items like tomatoes or apple slices away from crackers.
- Pack a dip or spread. A teaspoon of mustard or hummus makes simple stacks feel special.
Use a leakproof mini container.
- Assemble smart. Put crackers in their own dry compartment. Meat and cheese can share a section with a small piece of parchment between layers.
- Portion it out. For a light lunch, aim for 12–15 crackers, 3–4 ounces of meat, and 2–3 ounces of cheese. Add produce to fill out the box.
- Chill before packing. Refrigerate the assembled box for 20–30 minutes so everything firms up and stays cool longer on the go.
Keeping It Fresh
Store your lunch boxes in the fridge and eat within 3–4 days.
Keep crackers separate or add them right before eating to avoid sogginess. If packing for work or school, add an ice pack and use an insulated bag. For sliced apples, a quick dip in water with a little lemon juice helps prevent browning.
Benefits of This Recipe
- Customizable: Adjust portions and flavors to suit kids, athletes, or light snackers.
- Budget-friendly: Buying block cheese and deli meat by the pound saves money over pre-packaged kits.
- Balanced: Easy to add produce, whole grains, and protein for a more complete mini meal.
- Fast meal prep: Assemble several boxes in under 20 minutes.
- Portable: Great for road trips, office days, and after-practice snacks.
What Not to Do
- Don’t mix wet and dry items. Keep crackers away from juicy fruits and veggies.
- Don’t skip chilling. Warm cheese and meat won’t hold up, especially in warm weather.
- Don’t over-salt everything. Deli meats and crackers can be salty; balance with fresh produce.
- Don’t rely on only one texture. Combine creamy, crunchy, and crisp for a more satisfying bite.
- Don’t forget labels. If you prep for the week, date the containers so you eat the oldest first.
Variations You Can Try
- Mediterranean: Pita chips, hummus, feta cubes, turkey, olives, cucumber slices.
- Italian: Mini breadsticks, provolone, salami, pepperoni, roasted red peppers.
- High-protein: Whole grain crackers, cheddar, turkey, hard-boiled egg, edamame.
- Kid-friendly: Ritz-style crackers, Colby Jack, turkey, grapes, a small yogurt tube.
- Gluten-free: GF crackers with Swiss, ham, and carrot sticks.
- Lower-sodium: No-salt-added crackers, low-sodium turkey, fresh mozzarella, extra veggies.
FAQ
How far in advance can I make these?
Make up to 3–4 days ahead.
Store in airtight containers in the fridge and keep crackers separate until the day you eat them.
What cheeses hold up best?
Cheddar, Colby Jack, Swiss, and provolone keep their shape and flavor. Soft cheeses work too, but pack them in their own cup so they don’t smear.
Can I freeze the components?
Freeze deli meat if needed, but thaw overnight in the fridge before packing. Cheese and crackers don’t freeze well for this use, so keep those fresh.
How do I keep crackers from getting soggy?
Store crackers in a separate compartment or small bag.
Add them just before eating, and keep produce and dips sealed away from them.
What are good sauce options?
Mustard, honey mustard, hummus, ranch, or a light pesto are great. Pack just a tablespoon in a leakproof mini container.
Any tips for kid lunches?
Use fun cutters for cheese, add a small treat, and keep portions small. Include a familiar dip and a fruit they love to encourage balanced eating.
In Conclusion
Homemade Lunchables are simple, tasty, and endlessly customizable.
With a few quality ingredients and smart packing, you get a fresh, balanced snack that travels well. Prep a few at once, keep them chilled, and you’ll always have an easy grab-and-go option that beats the boxed version.
Printable Recipe Card
Want just the essential recipe details without scrolling through the article? Get our printable recipe card with just the ingredients and instructions.
3 thoughts on “Homemade Lunchables (Crackers, Cheese, Deli Meat) – A Simple, Packable Snack”